Mountain biking is perfect for getting outdoors, and an electric mountain bike can be even better. It is quite possible to convert your mountain bike into an electric one. This does take time to do, but converting your mountain bike will give you the ability to un-convert it later on if you wish to do so.
To convert your mountain bike to an electric mountain bike:
- Get yourself a mountain bike that can be converted.
- Get an electric mountain bike kit converter that will work on your bike.
- Follow the instructions with the kit to attach the new parts to your bike.
- Check everything.
- Enjoy your new ride.
While each of these steps sounds simple enough, it is a bit more complicated than it sounds. Any mistake on any of these steps can result in your electric bike not working. As a result, you should be careful and take it one step at a time.
Step #1 – Your Mountain Bike
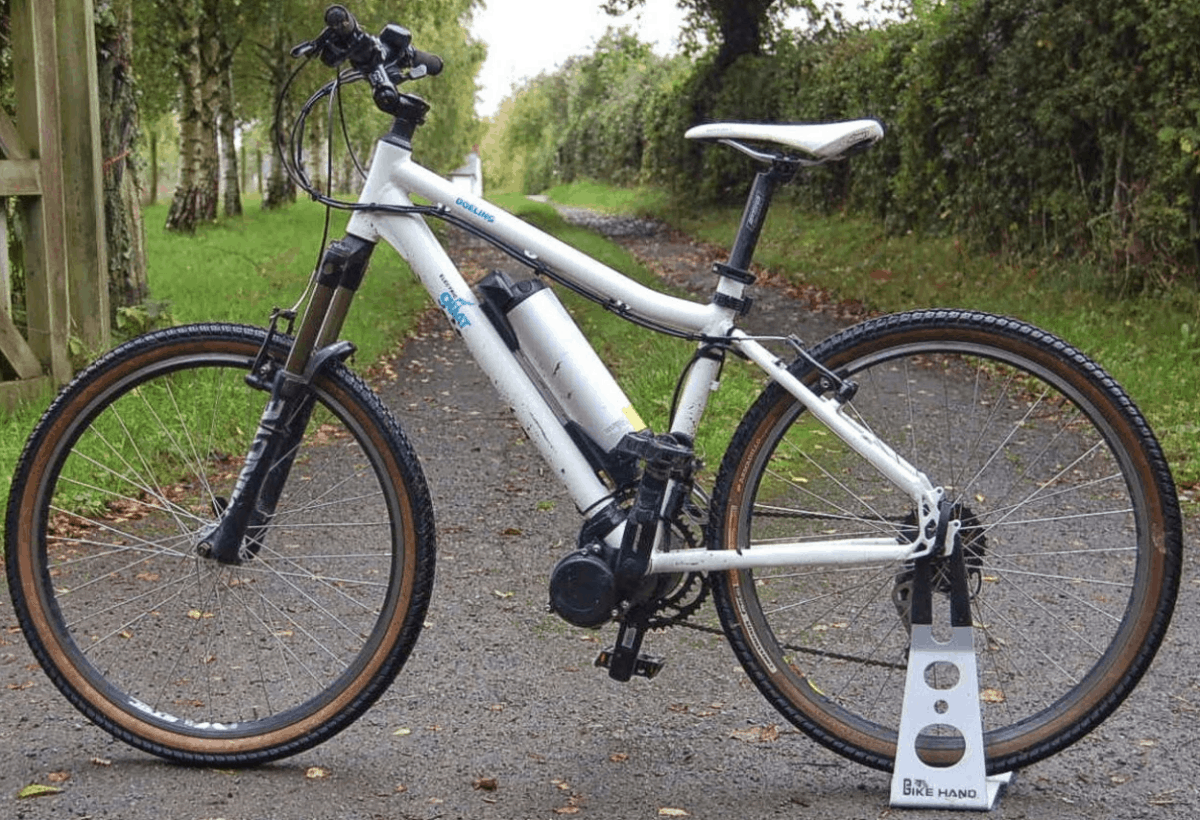
Not all mountain bikes will convert easily into an electric mountain bike. For starters, carbon fiber is too light to hold up to the extra weight of the electric parts. So, try to pick a mountain bike that has a durable aluminum frame instead.
The bottom bracket is particularly essential since it is here that some setups will have you attach the electrical parts to. While more of a preference, you should also lean towards a bike that has a front disk brake system.
Most conversion kits are also made to pair with a certain wheel size. The 26” and the 27.5” wheel sizes are the ones most commonly suited for this conversion. Therefore, your mountain bike needs to have this wheel size.
You may also want a mountain bike that does not have many, if any, gears. Gears can make it more difficult to install certain conversion kits. The shifter on the handle that is used to control the gears also clutters your handlebar even more.
Regardless of gears, you must have a mountain bike with wide handlebars. Part of the electrical system will be attached to your handlebars so you can control it. If your handlebars are too narrow, there will not be room for this.
Step #2 – Your Electric Mountain Bike Kit
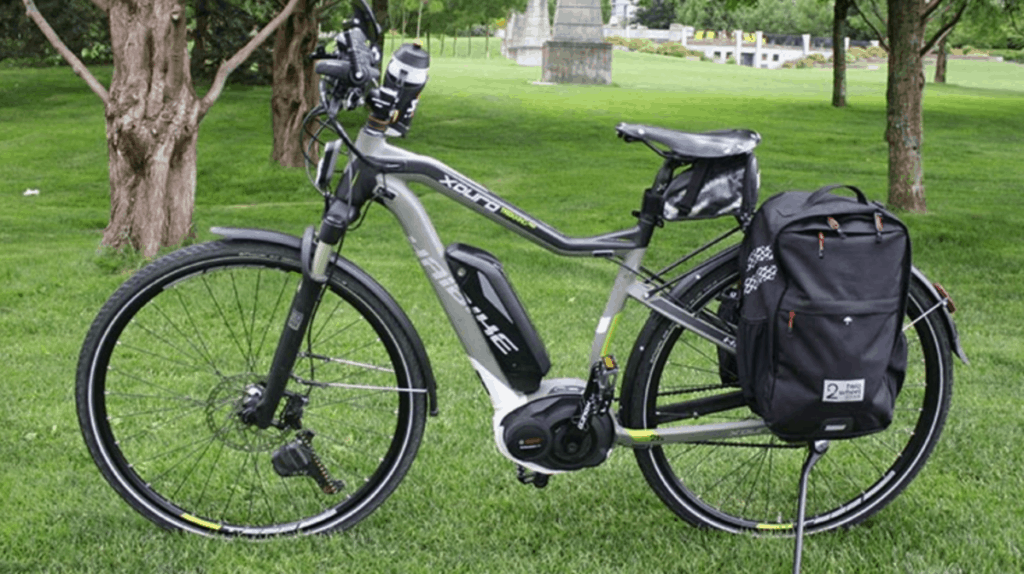
As mentioned, your electric bike converter kit should be one that will work with your mountain bike. These conversion kits come this the speed controller, the motor, the throttle, and the bolts. Not all kits come with the battery included, so check whether your kit does or does not before you buy it.
If your kit does not come with its own battery, you will need to buy one separately. There should be a paper with your kit stating what type of battery you need. If not, a bike shop that works with electric bikes should be able to tell what battery you need.
When looking at batteries for your mountain bike, the volts indicates the amount of power. Meanwhile, the Ah rating stands for amps-hour and indicates how long the battery will last. Most electric bikes use a battery that has between 36 and 40 wats and between 10 and 20 Ah.
If you cannot find the battery specifics you need on a paper, it is important to find that information from wherever you bought it from. Installing a wrong battery can permanently damage the rest of your electrics. Many kits come with their own charger, which can indicate what battery you need.
When choosing a kit, you do not want to go with a cheap conversion kit that might damage your mountain bike. Brand names do not necessarily mean quality, but they do often come with warranties if you are not satisfied.
Making Your Own Conversion Kit
Getting a kit makes converting your mountain bike into an electric mountain much easier, but you can gather the parts you need yourself. Doing your conversion this way can allow you to convert a mountain bike that may not be compatible with the kits available.
Step #3 – Installing Your Electric Components
Once you have your mountain bike and your kit, you need to do some prep work before you dive in. Read through any instructions that come with your kit and gather any tools that it says you will need. Next, you will want your bike flipped over with the seat and the handlebars on the ground in a position that makes it easy to work on your bike.
Different conversion kits need to be installed differently. Most will require that you take apart various parts on your wheels, while others may try to be simpler and instead have you simply attach some things to your bottom bracket.
Be prepared to entirely remove your wheels and to put on a wheel with a motor attached to it. The chain can sometimes be quite hard to get back on with the motor. However, it is possible to get the same chain back on!
Next, you will often need to re-adjust your brakes and wind the wires up your bike. Attach the gauge and controls to your handlebar, then is when you can work on attaching your battery. You must be careful when you are working with your battery and with the wires that attach to it, or you may end up getting shocked.
Step #4 – Check Everything
After you install all of the different parts to your new electric mountain bike, you should verify that everything looks right. Read through the conversion instructions one last time to make sure that you didn’t miss a step.
Go over each individual wire to make sure that it is secure and firmly connected on both ends. Walking beside your mountain bike for a short distance can allow you to watch your wheels and make sure that no wire looks likely to get caught or anything.
You will need some slack on the wires so that your handlebars can move and allow you to turn left and right. However, try not to give yourself too much slack. Your conversion kit may come with a fastener of some kind. If not, use a zip tie or something to attach your wires to your frame.
Take a short trip and measure your actual speed up against the speed that it says you are going. This is to make sure that the gauge on it is reading correctly. If everything checks out, then the last thing to do is to take it for a real ride and then go over all the nuts and bolts one last time to make sure nothing loosened up.
Step #5 – Enjoy Your Ride
In addition, if you are converting whatever bike you usually ride on, you get to keep riding on a bike that you already know the quirks too. When taking apart any part of your mountain bike, the more you can document, the better. Taking pictures of your bike as you remove certain parts can help you put everything back together again later.
Final Thoughts
While certain steps when making this transition can be complicated, there are plenty of resources available online if you get confused. Buying a conversion kit is much cheaper than buying a whole new mountain bike.
If you do not feel comfortable with converting your mountain bike yourself, there is no shame in taking your bike and kit to a bike shop and having them do it for you. You may be charged a fee, but you will know that it was installed correctly.
Finally, should you be tempted to take your mountain bike on the road, there is more you should know. While biking to the trailhead near your home may be possible if you live near a trail system, it may not be legal.
Depending on the design and how it works, an electric mountain bike can be considered to be a motor vehicle. You should check with your state and local laws about the rules in your area. Or, better yet, you can ask others who you see riding an electric mountain bike of their own.