
To people who are new to mountain biking, the difference between hardtail and full suspension mountain bikes can seem a little hazy. When you only have a vague idea what the difference between the two is, it can be impossibly hard to pick which one is the right mountain bike for you.
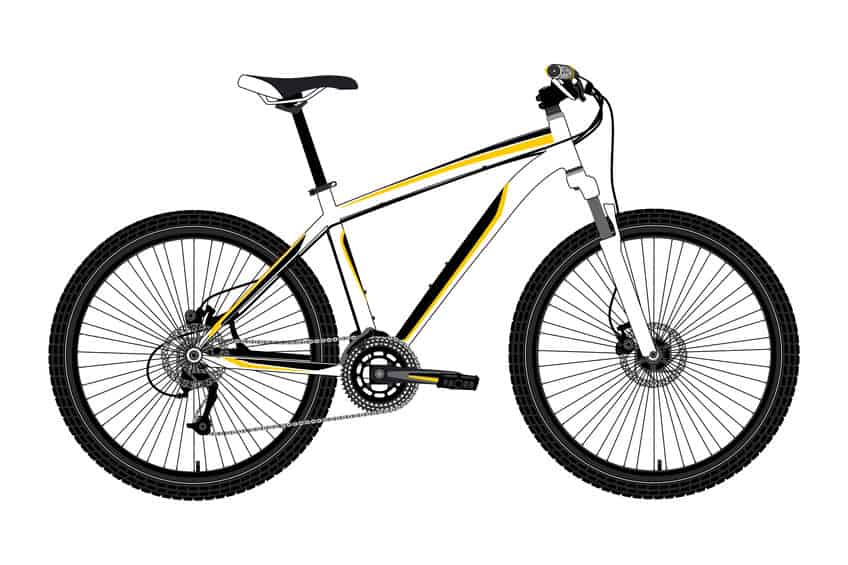
Essentially, a hardtail mountain bike is a mountain bike that has a solid frame with a suspension fork on the front and nothing for the back, making the back “harder”. A full suspension bike, on the other hand, has suspensions on both the front and back tires. Full suspension mountain bikes are more comfortable for bumpy trail terrain and also more expensive than hardtail mountain bikes.
While there is more to it than that, this is the simplest way to explain the differences between the two. To really get an idea of which one you should get, however, it is important to know what the pros and cons are for each as well as exactly how suspension bikes work.
Hardtail Mountain Bikes Pros And Cons
As mentioned, a hardtail bike is one that has its front wheel suspended but has no such feature in the back. When it comes to purchasing a new mountain bike, this option is almost always cheaper to buy than full suspension bike which is definitely a plus if you are on a tight budget.
When it comes to getting the most power out of your pedaling, the way that hardtail mountain bikes are designed give it a distinct advantage, especially with the rear wheel. On smoother surfaces this helps you to get to faster speeds more quickly and to be able to hold them longer before you wear out.
However, when the terrain is bumpy a hardtail suspension will not absorb the impacts at all. The result will not only be a much bumpier and more jarring ride, but the rear tire will also be unable to grip as well since it will be in the air more.
There is a difference when going downhill though. When going downhill the front tire gets a bit more of the impact and your legs also act as “suspensions” in the absence of having rear suspension. While this might be uncomfortable, and definitely tires you out more quickly, it can also be a good teacher to help you learn to pick a good line to follow.
In the long run this makes you a better overall mountain biker by strengthening your endurance and giving you a better eye for the trail. Because there is less parts to a hardtail mountain bike, this adds up to a little less weight in general than a full suspension bike, giving you a slightly faster ride. For these reasons also hardtail mountain bikes tend to be something that people either love or hate, with very few who are undecided about what they like!
Finally, when it comes to maintenance, both in terms of time and expense, hardtail mountain bikes come out the clear winner. Fewer parts mean fewer parts to care for, fewer things that can go wrong, and fewer things that eventually will need to be replaced no matter how well you care for them.
Full Suspension Mountain Bikes Pros And Cons
Like a hardtail mountain bike, a full suspension bike has the same forked front suspension that holds the front tire. These are easy to spot if you look at the back triangle that attaches the rear wheel to the rest of the frame. In a hardtail bike this connection is direct with no moving parts, but in a bike with rear suspension there is a whole “suspension” setup in between the two.
When it comes to purchasing a new bike, these are definitely more expensive than hardtail bikes due to the rear suspension that the other does not have. However, sometimes a really expensive hardtail mountain bike can be around the same price as a cheaper full suspension mountain bike.
While a full suspension mountain bike does not give you as much power when pedaling over smooth terrain, it comes into its element when going over technical details or bumpy terrain. Because the suspensions absorb the impact of the bumps, this allows the tires to stay on the ground more and to keep better contact.
This in turn gives your tires more grip and gives you better control as well as more speed when going over these areas. It also makes going over bumpy terrain less jarring on you and your bike than it would otherwise be. When going downhill it won’t give you as much help as at other times, but it will still add to your comfort, especially if you are new to mountain biking and have not yet learned how to pick a good line.
Even though hardtail mountain bikes are generally lighter in weight, it is still possible to have a full suspension bike that is lighter than a heavier hardtail bike. In order to pull this off, however, you have to be careful about the weight of all of other parts of a full suspension bike such as the frame etc.
While comfort is one of the main advantages to having a full suspension mountain bike, one of the main disadvantages is that this comes with a price tag. All of those pivots and connections will need to be serviced at a bike shop ever so often to keep them in optimum condition so that you can get the full benefits of having the suspensions in the first place.
You will also have to pay to have these parts replaced every now and then. An additional cost to this kind of bike is that the rear shocks will need new seals to be purchased every year or so. Full suspension mountain bikes will also often wear on the chain some, which will cause this to need to be replaced more often too.
Final Thoughts On The Two
If you are just starting out with mountain biking, enjoy simpler bikes with less fuss to them, or are just on a tight budget, then you should probably go with a hardtail mountain bike. It will not only save you money when you buy it, but will save you more money further down the line as well.
If, on the other hand, you are old, simply enjoy your comfort, or are far more interested in doing technical trails, then you should probably go with a full suspension bike. Even though it costs more money, it can be well worth the investment if it helps your mountain bike to match your riding style. You should also make sure that you know how to take care of the suspensions and do so faithfully.
How Do Front Bike Suspensions Work
No matter which kind of mountain bike you go for, either one will have a front fork suspension. Suspensions work by using two main things; one thing being the spring and the other thing being the damper. The purpose of the spring is to provide resistance against what is pushing it and the purpose of the damper is to control the spring.
In the front bike suspensions of a mountain bike there are two main different types of springs. These are coil springs and air springs. Coil springs have a metal coil and look very much on the inside like a click pen does if you have ever taken one apart. Most of these have coils that are made from steel, though a few go with titanium.
While coil springs do tend to make the suspensions that use them heavier, they are often considered smoother than air springs. Coil springs do not have as wide a range of adjustments that can be made to them since there is a limit to how much you can adjust the spring.
Air springs, on the other hand, are lighter and are more adjustable as you can simply add or take away the air to affect it to a greater degree. However, these do not tend to be as smooth to ride as the coil spring suspensions are.
Whatever type of spring your suspensions feature, the basics of how it works are still the same. As the wheel hits a bump it compresses the spring. The spring then pushes itself back out into its natural shape as soon as it is past the bump.
It takes more force in order to compress the spring further, but if too much force is added and the spring compresses completely then this is referred to as “bottoming out” which can be quite a bit jarring to experience. This is also bad for your suspensions, so it is best to avoid bottoming out if at all possible.
If the spring was all there was then you would end up with the same effect as a bouncy ball. By this I mean that you would bounce up lower and lower a few times after each bump you hit while your spring got back into place.
This is when the damper comes into play and why you need to have one. The damper works by absorbing the energy from the first bounce so that there are no successive bounces after it and lets the spring go back to its proper shape.
The damper works by using oil, and to prevent this oil from getting out there are a number of different seals in suspensions. There is also more oil other than that which the dampers use and this helps to keep it lubricated so that it moves smoothly and does not stick or scratch as the different parts move.
How To Test And Set Your Mountain Bike Suspensions
The forks that absorb the impact for the front wheel measure their shock absorption in millimeters and it is referred to as the “travel” of the suspension. The more travel you have, the bigger the shocks your tire can take without you feeling it as badly or bottoming out.
When you get a new bike or new suspensions for your bike it can be a good idea to test the suspensions. In order to do this you will need a tape measure and a shock pump, with a pair of extra hands being very useful if they are available to help. You should also check this on a regular basis and recalibrate it when needed.
If you look closely at the front suspension you will see that there are different knobs and levers. Each of these have a purpose and you should know how to use them. The main two features that you should be interested in are called the sag and the damping, but first let me explain what each of these is.
The sag is the amount of the suspension that you use just by sitting on the mountain bike with your full weight on it. The damping is how “springy” the suspension is and how quickly it will spring back into place after hitting a bump in the path.
The first step in checking and altering your suspension is to see what your sag is. For the best results when you are doing this, you need to dress up in what you normally wear when you are mountain biking, even down to your helmet and water bottle and everything else that you usually have on you.
Most suspension forks have a rubber ring – often red in color – around one side of the forks. Move this all the way down as far as it will go and then sit on the bike and put all your weight on it. You don’t have to ride it at all, in fact it is probably better that you don’t, and you don’t want to bounce on it at all either. Once you have done that, then you can carefully climb off of your mountain bike.
Make note of where the rubber ring moved to in order to know the sag of your mountain bike. If your bike does not have a rubber ring already around it you can try to use a rubber band, or better yet have a friend mark the line on the suspensions while you are staying still on the bike.
Ideally you want your sag to account for no more than 25%-30% of your full travel distance that your suspension can go up to. This being the case, what you want to do now is to measure your suspensions and see how much of the full distance your sag takes up.
If you see that your suspensions have more than the optimal amount of sag, you should add more air in. The way that you do this is by using a shock pump and by putting the air in using the Schrader valve which you will see on the top of the suspension fork. Pump the air in a little at a time and re-test your sag as you do this until it is the right level. If you find that you added too much air you can release some of the air the same way.
The other thing that you should check on is the damping, and like the sag you should do this on a fairly regular basis. The damping knob is located at the very bottom on the underside of one side of the fork suspension and is most often identified by a red knob. This knob will either say Fast/Slow or show an image of a rabbit/tortoise.
The way to test the damping is to ride over something bumpy a few times. Riding off of a sidewalk curb into the edge of the street a few times in a row is a good way to do this as long as you have looked both ways and seen that there are no vehicles coming along. You can also do this on a technical part of a trail.
If the rebound setting on your damping is too slow, riding over multiple bumps can make your suspensions compact as it will not give it the time it needs to get back into its proper place. Eventually the suspension will end up being fully compacted and will feel very uncomfortable.
If, on the other hand, your damping setting is set to a too fast rebound speed you will feel it bounce you and maybe even the whole bike up as it bounces back into position. This can give you the impression of being on a pogo stick and it will hardly make for a comfortable ride on your mountain bike!
Like with the sag, it is important to make any adjustments a little at a time and to then test them out. It is also important to get your sag where it is supposed to be before you correct your damping because the one will affect the other.
Anytime that you make any other adjustments to your bike, whether it is simply changing your handlebar height or anything else, you should always correct your suspension levels afterwards. This is because any little thing will affect your sag and therefore will also affect your damping.
You should also check your suspensions after every 24-48 hours of use if you want to keep it at its optimal settings. Another reason for you to check it is if you have gained or lost weight recently since every ounce will affect the sag.
If you happen to have a full suspension bike, these same things apply for setting your suspension on your rear tire. In this case you should set both of them at the same time for sag and then both for damping, since each one will affect the other if you try to do them one at a time.
Finally, you should also have them completely serviced at a bike shop at least once a year so that they can get a thorough deep cleaning. You also want to clean and lubricate your suspensions regularly yourself at home.
How To Care For Your Mountain Bike Suspensions
No matter which kind of mountain bike you have, you will want to take care to lubricate your suspensions regularly. Doing this will help prevent grit and grime from seeping in and causing internal damage to your suspensions.
Take extra care when cleaning your bike to make sure your suspensions are cleaned well, wiping around the seals in particular and even drying them off. Take some of the same kind of oil that is inside your suspension forks and put some of it in a syringe. With the syringe go around the seals and give them a good coating to help make sure that they are lubricated well.
Once you have done that, take some more of the oil and put a little bit of it on a rag. Use this rag to wipe down the stantions, giving them a thin coating all the way around. Do this process every time you clean your bike and if your bike has been sitting in the garage for a while without being ridden.
Be careful when you are washing your bike with a spray washer that you aim away from the seals so that you do not force water into them. It is also a good idea to hang your bike upside down when possible when you have it drying. This is so that the oil inside will be able to come up to the top of the seal after having worked its way down to the bottom after a long ride and so that the water will be running away from the seals.
As a general rule a bike should be taken into the shop once a year for a thorough overhauling of all of its parts. Should you prefer to do some of this yourself you can, though for some things it is far better to take it in so that you do not damage it.
To work on your fork suspension you first should remove it from the rest of the bike. As you remove it be sure to take pictures as often as you need to so that when you go to put it back together you will have a reference to look back on.
Take a brush or a rag and wipe down the suspension, making sure that the direction you are rubbing in is away from any seals since you do not want to be rubbing the dirt into them. Once you have cleaned off as much of the dirt as you can, the next step is to lift the first seal which is called the dust wiper. This can be done with a flathead screwdriver if you are careful not to scratch your suspensions.
Once you have the dust seal lifted, put something around the stantion to cover the whole so that nothing falls into it while you clean the dust seal. Once you have this clean, you can then remove the cover and lift out the next seal which will often be made of foam-like material that should be moist with the oil it is holding.
This foam seal should look clean and undamaged. If it looks dirty or like it has been damaged then both it and the dust seal will need to be replaced and you will need to change out the oil as well in case any dirt or dust worked its way into that.
While it doesn’t take much to go this far at home yourself, you should let the bike shop change out the oil for you. Any scratches on your mountain bike suspensions, no matter how small, are really bad for it and should be taken care of as soon as possible. This is because any scratches, and especially dings on the stantions, will wear away at the seal with the up and down movement of the suspensions as you hit anything or simply get on and off.
In order to repair a ding or a scratch you will need a few items. First, you will need a wet piece of sandpaper of about 1000-2000 to gently sand the spot a little. This should remove every particle of dirt and help out with the later steps. Next clean the area with a dab of rubbing alcohol to get any dust you made from sanding off of the area.
Wait until this completely dries and then grab some clear nail polish. Apply one layer at a time, trying to get the nail polish only in the ding or scratch if possible, and wait to let it dry completely before applying more nail polish. Do this until the area feels smooth and then sand it down with more of the same wet sandpaper until you can no longer feel that your stantion was damaged there in the first place.
Finally, there are certain things that you can buy to help extend the life of your suspensions. One of these is mud guards which work, as its name implies, by protecting your suspensions from some of the mud that the rear tire can kick up.