If you’ve recently gotten into mountain biking, or even if you’re a seasoned mountain bike rider, you may be wondering if it is possible to convert your bike to 29 inch wheels or if you can convert your mountain bike yourself. Also, you are likely wondering if there any downsides to converting your mountain bike to a 29er.
Yes, it is possible to mount 29 inch (29er) wheels onto a modified full suspension 26” mountain bike frame. However, it does require specialized tools, and you must be comfortable with basic bike modifications.
Unless you already have a full tool set and skills in this area, it is unlikely that converting your 26” mountain bike to a 29er will save you any money if you do it yourself. In addition to this, while there are many potential advantages to 29er tires as compared to smaller mountain bike tires, you may not get all of the full benefits without using a 29er frame.
Why Would You Want A 29er Mountain Bike?
Sometimes, size doesn’t matter. But when it comes to mountain bike tires, it definitely does! The size of your tires can affect things like your top speed, the stability of your overall ride, and whether or not the bike can easily ride over obstacles on the trail. While many weekend warriors dream of having one bike that rides just as well in the mountains as it does on the city streets, you will always have to make some sacrifices in even your most ideal build.
Most daily bike commuters might choose to have a road bike, or perhaps a hybrid bike. While neither of these bikes will perform extremely well on difficult trail rides, they are fine for easier trails. But maybe you’re a mountain biker who wants to convert your trail rig to a daily commuter.
29 inch wheels can give you the flexibility you need in order to do both of these things, at the cost of some of the advantages given by smaller tires. Compared to a 26 inch mountain bike, a mountain bike with a 29 inch tire can offer many advantages.
Overall, larger tires make the bike faster and more stable, even though they are also slightly slower to steer. They are also better for taller riders, especially those with longer legs. Some of the other advantages include a more stable bike as mentioned.
However, you might think that a bigger bike would be less stable, and that would be correct if this bike put you higher up off of the ground. The fact is that 26 inch bikes have to be enough off of the ground in order to have room for the pedals not to hit the ground with each rotation.
29 inch bikes do not have to be the slightest bit higher off of the ground in spite of the taller tires, putting your center of gravity lower as you are more in the tires instead of above them. This is what makes this setup more stable.
However there are plenty of other advantages to this size of a bike besides that, including:
- Higher top speed
- Smoother ride over roots, branches, rocks, et cetera
- Less pedal bob
- Ideal for taller riders
- Increased traction, which is ideal for going downhill
- Better at cutting through overgrown trails
- More efficient on long rides
- Can be ridden on lower tire pressure for a smoother overall ride
If you are looking for a mountain bike that can ride well on both bumpy hiking trails and a regular commute, you may want to consider doing this conversion on your mountain bike. You can simply fill the tires to max pressure for when you plan on riding on the road, and then let out a bit of air before riding the trails.
What Are Some Reasons You Would Not Want A 29 Inch Mountain Bike?
A mountain bike with 29 inch wheels, just like practically everything else that you could change on a mountain bike, also has some downsides. Notably, the bike will be heavier, which can be a big problem for some situations such as when you are going uphill or having to do any hike a bike sections in a trail.
If you’re a smaller person, or someone who needs to take your bike on a commute that includes a bus or train, you may find that the larger, heavier bike is not ideal for you. Lifting a heavy bike repeatedly can cause injury to your back, as can riding a bike that is too large for you.
They are also not ideal for petite riders since they are far too big, and are especially not suited for children to use. No matter how tempting it might be, don’t try to force yourself to use a bike that’s too big for you! Remember, that there is a big difference between picking up a bike to lift it over a curb, and hefting it high enough to attach to the bike rack on a city bus – assuming that the particular bus in question even has one.
Also, while the slower steering might be fine on flat trails and road, it’s not necessarily safe for anything that requires reflex quick turns since the bigger tires take longer to turn. In addition, they take longer to get their momentum going.
You will need to consider these downsides very carefully before making a decision, keeping in mind how you ride and your style. If you ride in places that require a lot of starting and stopping for instance then this will make a bike with wheels of this size seem all the heavier and bulkier to you.
Will 29er Wheels Fit On My Bike Frame?
Before considering this project, you’ll need to determine if your bike frame can even accommodate a larger wheel rim. Not all mountain bike frames are designed to allow this change to be made to them. However, with a full suspension mountain bike, you may be able to change the fork, which will allow it to accommodate a larger tire.
Though this won’t do anything for the rear wheel, it is perfectly acceptable to have your front tire be bigger, and it will at least save you half of the money you would spend in paying to have both tires changed out. You will want to change the fork to a regular hybrid/cyclocross bike fork, or a 100mm suspension corrected 26 inch fork. Both should work equally well.
With a regular 29/700c fork, you can use rim or disk brakes, depending on fork. Check the manufacturer’s specifications carefully before you decide which fork to buy! On the 26 inch suspension corrected, you’ll need disk brakes to put a 29 inch wheel.
A mountain bike modified in this way is called a 69er. The bike will ride a little differently, because it will be slacker in the head tube. This makes the position more upright, which is best for downhill riding. If you prefer your mountain bike to ride more like it did before, you can reverse the stem, making it downwards instead of upwards. Your steering won’t be as sharp, but you’ll go more easily over bumps.
What tools will I need to complete this conversion?
If you have a full suspension mountain bike, and you want to swap in a 29 inch tire, these are the tools and supplies you will need:
- Allen sockets 3, 4, 5, 6mm (for use with your torque wrench)
- Allen keys 3, 4, 5, 6mm
- Side cutter
- Bike stand
- Soft face hammer
- Chisel or standard screwdriver or crown race puller
- Tape measure or ruler
- Hacksaw
- Half round file with holder
- Shop rags
- Pipe cutter with new blade
- Threadless saw guide
- Threadless nut installer
- Tube that will fit over the steering tube and install the lower crown race
- Torque wrench
- Shock pump (high pressure up to 250psi)
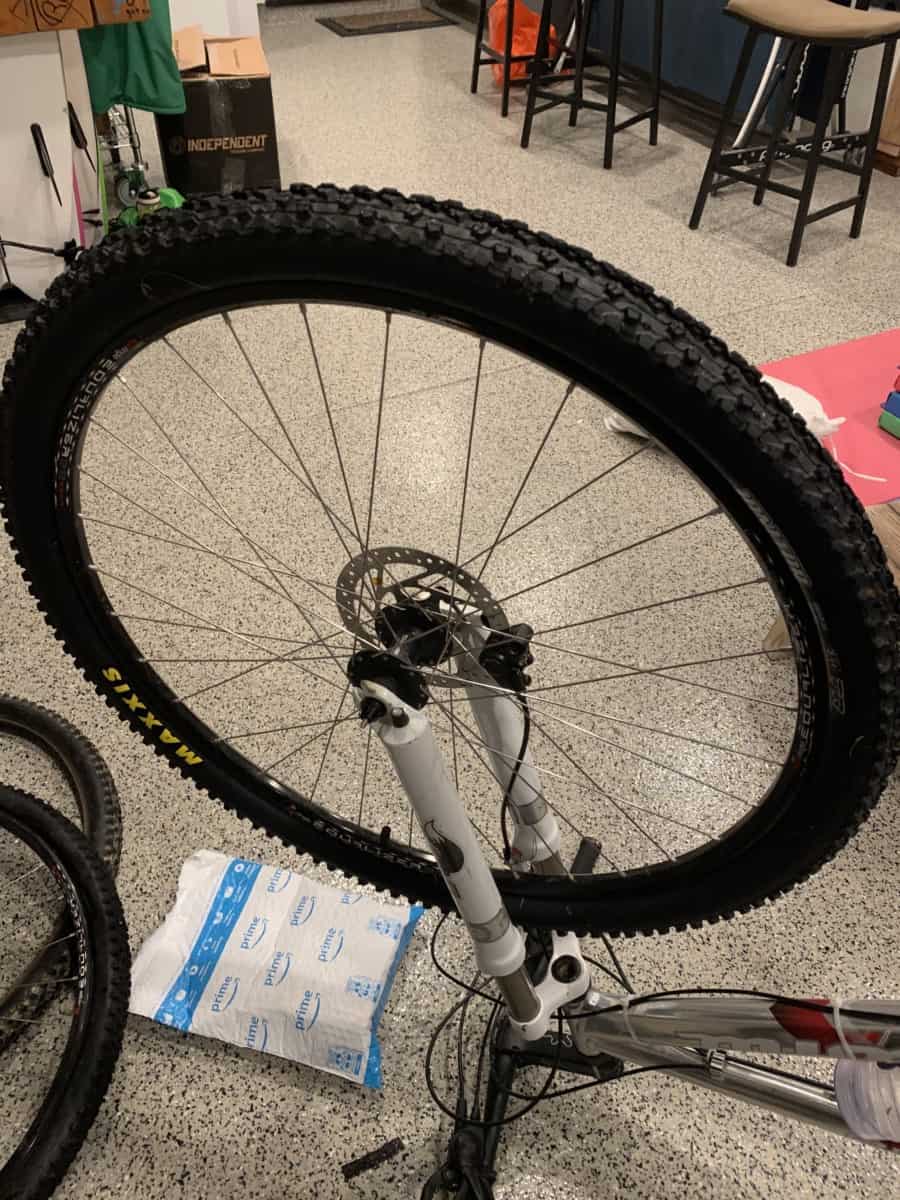
The Steps To Change Out The Fork For A Bigger Wheel
Step One: Remove the front wheel and top cap.
Step Two: Remove the front brake by taking off the two bolts that secure the caliper onto the fork. If you have an International Standard adapter, simply remove the brake from that point. Keep all the bolts separate, as these are different from what’s used in the rest of the bike.
Step Three: Remove Brake Hose. If your brake hose is attached with a small plastic tie wrap, simply cut it off, taking care to avoid the brake line. If it is on a plastic mount, take off the hex bolt holding the clip in place, and move the brake hose and caliper out of your way. Never remove the brake line from the caliper!
Step Four: Remove the Stem Assembly. Keep one hand on the lower crown, holding the fork in position as you loosen the stem bolts. When the bolts are loose, remove the stem and bar together and set it on one side of the bike. Finally, remove the spacers and top crown race and set them aside.

Step Five: Remove the fork. Pay attention to the orientation of the lower bearing race and seal. This is a good time to make sure that the bearings are still moving smoothly, and if not, think about getting a new headset.
Step Six: Remove the lower crown race. If you plan on keeping your headset, now is the time to remove the lower race. There are two options that you can use for this. One is that you can use a sharp chisel or screwdriver to tap the race off by working evenly around ring. Wedging the chisel between the fork crown and race, pry it upward until it pops free.
Step Seven: Measure the steering tube length from the mounting face of the crown to the end of the steering tube and mark the spot with a marker or whatever else you might have that is handy.
If plan on installing a new headset the you will need to measure the head tube of the bike, then check the manufacturer’s specs for the stack height of the headset and the spacers and the thickness of the stem. Add these numbers, then subtract 2mm from that total. This is the length that you need to cut.
Step Eight: Mark and cut the fork. There are two ways that you can do this. The first is to use a threadless saw guide and a hacksaw. Set your guide so that when the blade draws over your mark, it rests just above the cut line, not on it or below it.
This helps make sure that you do not accidentally cut the tube extension too short. Try to remember to ease up on the last few strokes, as this will prevent a large burr from forming at the end that you would then need to file down. Finally, remove the saw marks off the top and file the edge at a 45 degree angle to ensure there is no burr or edge.
The second method that you can use to accomplish this same thing is to use a pipe cutter with a fresh blade. Just make sure to line up your pipe cutter just above the cut line and rotate it evenly to get a clean cut.
Step Nine: Install the star nut by screwing the star nut onto the nut setting tool all the way, then carefully line up the star nut with the steering tube. Tap the star nut in place and make sure you set it in a minimum of 5mm. However, be sure that you tap the bearing ring in place carefully, and make sure the race sits squarely on the fork crown.
Step Ten: Replace the lower bearing and seal, then install the fork. Next, install the upper bearing, keeping the orientation in mind. Then, install the compression ring flat side up, and the top cover. If you are going to use spacers below the stem, install them now, followed by the stem itself. You should now have 2- 3mm of space. Finally, replace the top cap and stem bolt. Do not torque anything at this point.
Step Eleven: Install the front brake and cable next. With the brake loosely placed, ensure you have the correct bolt length by making certain you have 8 threads exposed past the caliper. Replace the front wheel with the disk, careful not to jam the rotor into the pads.
Once you have done that then set the caliper in place. Slowly press the brake lever, keeping the caliper as centered as possible and then you can tighten the bolts down. Release the brake and spin the wheel, listening to make sure that the pads are not touching the rotor.
If you need to re-adjust the brake, loosen the bolts slightly and carefully moving the caliper until you don’t hear it rubbing when the wheel spins. Never put your fingers near the rotor while it’s moving!
Once it’s properly installed, apply brake pressure again and torque the caliper bolts to the amount recommended by both the brake and fork manufacturers.
Once you feel that you have done that part correctly, then make sure the cable isn’t rubbing on any moving parts. Some forks come with a mounting point, while others require a tie wrap. Next, line up the wheel with the stem and bars. Stand in front of the bike and hold the wheel between your legs. Grab the bars and wiggle them side to side, slowly centering them. You can now tighten the stem bolts.
Finally, double check if the bar is straight. Take the front brake and rock the bike forward and backward while listening and feeling for a soft thump. If the front makes a thumping noise, you may have insufficient preload on the stem top cap. In this case, you will need to loosen the two stem bolts a little and give the top cap bolt a half turn.
Keep doing this until the thump goes away. If the steering suddenly gets too stiff, you have gone too far on the top cap tension. Once you have the correct tension, line it up and now torque the stem bolts (use the correct torque from the stem manufacturer). Every mountain bike is slightly different, so make sure to look up specific instructions for your model of bike before you begin.
What if I don’t have a full suspension mountain bike?
According to the experts, it is nearly impossible to fit a 29 inch wheel rim on an unmodified 26 inch mountain bike frame. Rather than attempting this, you could instead sell your existing bike and put the money towards a 29 inch mountain bike frame.
A good place to start would be your local bike shop, who may be able to help you find a reputable buyer for your existing bike. You can also create a listing on your local Facebook marketplace. Make sure to include several clear pictures, disclose any issues, even if you’re only cosmetic, and meet the buyer in a safe public space. Many police stations now have an area in their parking lot specifically for meeting up with online buyers and sellers.
Is It Safe To Convert My Mountain Bike To A 29 Inch Wheel Myself?
Most mountain bike experts will tell you “do it only if you feel comfortable.” If you’re someone who has already done a lot of work on customizing your bike, taking apart and rebuilding bikes for fun, then you’re the ideal rider for this project. If you aren’t yet confident in bike customizations, try practicing first.
It is fairly easy to find old bikes for free on local buy/sell/trade sites, which you can use to learn on by trail and error and it is far better to try this and mess up on an old and worthless bike frame than on the one you want to keep. Even if they’re not in rideable condition at all, you can still practice removing and reinstalling parts until you feel comfortable tackling a bigger project.
When testing a bike that you have worked on, be sure to wear a properly fastened and tightened helmet, and do your first ride in a flat, safe, quiet area without a lot of traffic or obstacles. But, make sure it’s not so remote that you won’t be able to get help if you’re hurt!
If you find that the bike doesn’t ride smoothly, or it makes any strange noises that you can’t identify, then you should not keep riding it. If you try and try again and still cannot figure out what is making that noise or what to do about it, then you might need a second opinion.
Take it to a professional bike shop or to someone who really knows bikes and who might be able to give you some pointers or may even know what is wrong. It’s much better to swallow your pride (and maybe to even open your wallet) than to damage your bike permanently or get injured because of bad modifications.
Will Converting My 26” Mountain Bike To A 29er Save Me Money?
Compared to buying a new 29er frame, converting your existing 26” frame might sound like a way to save money. However, that’s not necessarily true. If you don’t already have the tools necessary to do major bike repairs or modifications, as listed above, then this will likely require a significant investment. Another option would be to borrow the tools from someone who already has them, but you may not know anyone who does.
Once you have purchased all of the tools and then accounted for the cost of your time as well, the conversion to 29er is probably not going to be much of a savings. If you’ve decided a 29er mountain bike is ideal for you, consider saving up to purchase one instead.
What If I Want To Switch Back To A 26 Inch Mountain Bike?
According to experienced rides, it’s very unlikely that you will want to switch back to a 26 inch tire after riding on 29er. Once you get used to the smoother ride, better handling of bumpy trails, and higher speed, you probably will not want to go back.
However, it is possible to mount smaller wheels back onto a larger frame. Many manufacturers even sell what they call “26 plus” wheels, which are 26 inch wheels designed to fit better onto a larger frame.
One reason to do this might be because you’re giving or loaning your bike in the long-term to a much shorter or smaller rider, and they will not be able to handle the large tires. Another possibility is if you plan on doing a lot of mountain biking with technical features on a trail where you will need the faster steering.
Conclusion
Most experienced riders will recommend buying a mountain bike with a frame designed to fit the wheel size. While it is possible to convert some 26 inch mountain bikes, as we’ve outlined here, it is probably not the ideal way to get the advantages of a 29er bike.
For riders who like to tackle difficult mountain trails, a 29er bike will present a lot of advantages. These advantages include better handling, more efficient riding, and a higher speed, especially when going over small obstacles.
However, they may find that it doesn’t perform as well for street riding, especially in crowded areas. A 26 inch mountain bike doesn’t handle bumpy trails as well, and it can’t go as fast. However, the steering is faster and more responsive, so it’s better for occasional use in crowded areas and for the technical trail features.
The relatively new 27.5 inch size mountain bike is designed for those who want something that strikes a balance between the extremes of these advantages and disadvantages.
While it is entirely possible to modify some frames to fit larger tires, and to mount smaller tires on larger frames, it’s always better to have a bike frame that is designed to fit the wheel size you want. Modifying a bike frame to take a larger tire is not just a simple weekend project for a casual rider. Be extremely careful when testing any bike you have modified, making sure that your first ride is in a safe area and you are wearing a helmet that’s properly fitted.
If you’re not sure which size is best for you, visit your local bike shop to try out a few different frames and see which one seems to suit you best. Very often, no amount of hands-off research can truly match the experience of physically trying a bike to see how it feels. Bike fit is very personal, and you might be surprised how much difference it makes to sit on a bike that really feels right.
Once again, if the idea of modifying a bike intrigues you, but you don’t have much experience, consider picking up free or cheap bikes that aren’t in rideable condition on your local buy/sell/trade sites. You can then use these bikes for practice, and maybe even salvage some parts you can use on future customizations. Look for a lot of old bikes to show up on these sites in the spring, and also right after the big gift-giving holidays when people are looking to make room for their new purchases.
Riding a mountain bike is one of the most fun, adventurous forms of exercise. Learning how to fix and modify your own bike can be very empowering! However, it’s also something that requires a lot of practice to do safely. Before you embark on a project like this, make sure you have all of the tools and expertise you need.