Maybe you are looking into getting a used mountain bike, or maybe you have already gotten a used one from a friend or bought one from someone who just got a new one. Even if you are feeling satisfied with the overall inspection of the used mountain bike or MTB you recently purchased there are a few things that you should at least consider replacing.
This is, of course, after you have checked the frame, the stanchions, the bottom bracket, and the chain to make that these are at least in working order. There are a few things that might need replacing, here are 5 things that you might need to replace when you buy a used mountain bike.
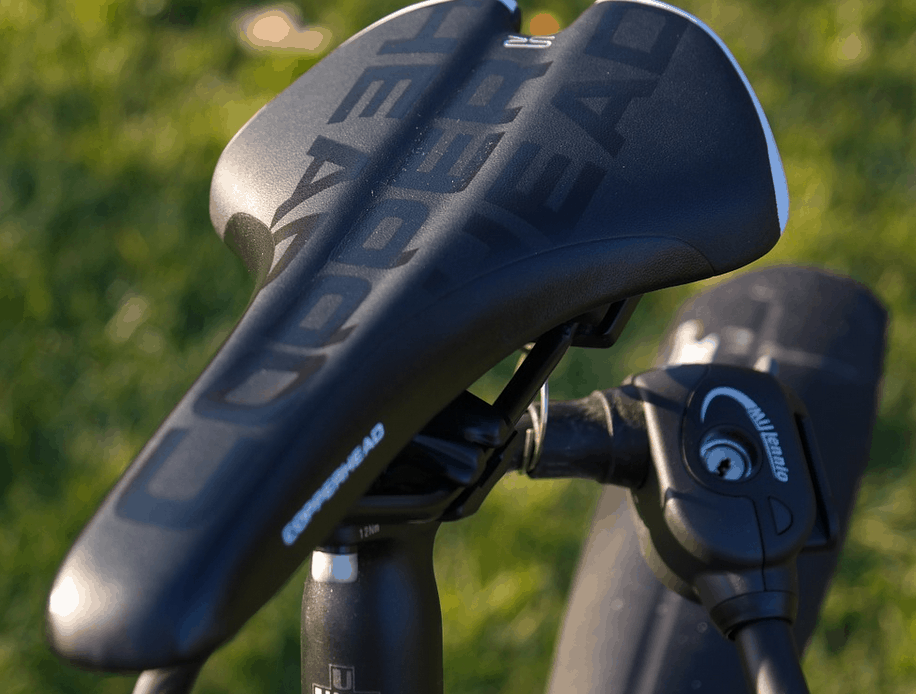
1. Saddle
In some cases, not all, when you buy a used mountain bike the seller might opt to keep their saddle. Since your sit bones need to rest comfortably on the saddle, the saddle should fit like a comfortable pair of shoes. In short it is not a red flag if the seller wants to keep their saddle. Saddles range in design, engineering, and price range.
If your bike didn’t come with a saddle, then obviously you will need to get a new one. When selecting a saddle it is important to remember that you should select one with moderate cushioning, especially for longer rides. Cutouts won’t work for everyone, and keep in mind that you may be able to test before you buy through a local bike shop.
Replacing the Saddle
Installing or replacing a saddle is fairly easy for you to do yourself. All you need is the proper tools: a Hex Key/Allen Wrench set, measuring tape, grease for bicycles, rubbing alcohol, paper towels, and a level.
Assuming that your mountain bike is equipped with the two rail saddle system, follow these steps. Keep in mind that some seat posts will have two bolts holding two plates together and others have one bolt holding two plates together. Before you begin, make sure your bike is on a repair stand.
First, using the measuring tape, measure the height of the current saddle. If there is not a saddle already on the bike, skip this step. When measuring, measure from the bottom bracket to the top of the saddle and then you can loosen the bolts using a Hex Key/Allen Wrench.
Once the bolts are loose, you should be able to slide the rails of the saddle out of the tracks with very little effort. If you are working with a two-bolt system you might have to remove one bolt completely if the saddle will not slide out without too much force.
If you have to do this, turn the top plate so it rests across the other plate creating a plus sign. Then the rails can be easily removed from the tracks. Next, take a paper towel and wipe the tacks down, this will remove any larger sand or mud debris. Repeat this step with a little bit of rubbing alcohol on the next paper towel.
Once you have finished cleaning out the tracks it is time to put the new saddle in. For this you will need another paper towel and a small dab of the grease for bicycles. Apply the grease to each rail to cut down on any creaking noises, then use the paper towel to wipe down any excess grease.
You should now be able to slide the new saddle in with the same ease as you removed it. Tighten the bolts now to keep it in place, but not completely since you will need to make sure the saddle is level. Once the bolts are tight enough that the saddle seems level, place the level on top.
When first installing a saddle it is very important to start with a level saddle then make adjustments later. When your saddle is level tighten then finish tightening bolts. If you started out by measuring the height of your saddle you’ll want to remeasure and confirm that it is the same height. The height can be adjusted by lowering or raising the seat post.
If your bike did come with a seat on it, if you are experiencing any pain or discomfort when riding this could be a sign that it needs replacing. However, to make sure it is really the seat should check a couple of other things first.
The main problems might be your handlebar position since this can be the main cause of saddle discomfort. If you are drawn forward off the wider part of the saddle then the handlebars are too low or too long causing pain in the sit bones and pelvis. If you have tried repositioning your handlebars and your weight distribution is near perfect you might want to consider replacing your saddle.
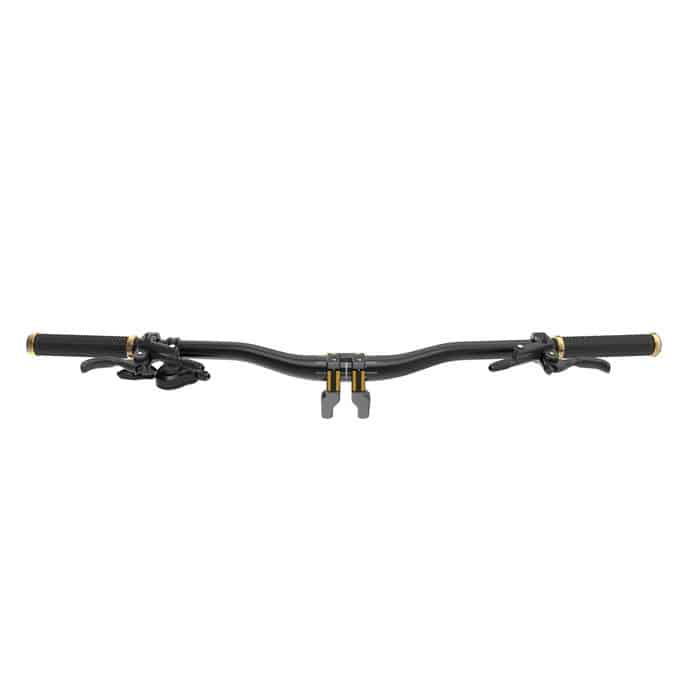
2. Handlebars
Another part you might need to or even just want to replace is the handlebars. There are several reasons for this, one of which is for customization of the bike. Riders have specific tastes when it comes to which handlebars they prefer. Some riders prefer wider set bars or bars with a higher rise as a couple of examples.
Another reason you should consider replacing the bars is for safety, since some say that aluminum bars should be replaced every three years as a rule of thumb. Carbon bars have been said to last longer, and handlebars come in other materials such as steel, and titanium. Each material lending its own unique performance property.
There are factors that determine the longevity of handlebars, especially on used mountain bikes. Some of these are how hard the bike ridden, how frequently was it used, and how many crashes it was in.
Checking for clear signs of damage and stress marks is the first step in determining whether or not the handlebars need replacing. If there are cracks or any types of deformation near the stem you should replace them. If your handlebars are in good condition and you do not need to replace them, then you should at least get them adjusted to your height.
Replacing Handlebars
When installing handlebars be prepared for a slightly more advanced task than the saddle installation. This process requires precision in placement of the controls and, depending on the complexity of your used mountain bike, this is something that can require at least a few extra steps.
Before you begin you’ll need to choose a new set of handlebars with a diameter that matches the stem clamp on the bike, the 4 most common sizes are 22.2mm, 25.4mm, 31.8mm, and 35mm. The stem should be stamped with its diameter but you can measure the handlebars with a metric caliper in the exact spot where the stem will clamp onto the bar. It is of the utmost importance to be exact in your measurements stem clamps are not cross-compatible and some stem clamp diameters are within fractions of a millimeter to each other.
Now that you’ve picked your bars you will need a measuring tape, a level, a Hex Key/Allen Wrench set, a torque wrench and bits, grease for bicycles, assembly compound if installing carbon bars, and rags or paper towels.
After placing your bike in a repair stand, the first thing that you will want to do is measure where your controls are, including your brakes and shifters. You may even want to take a photo with your phone for reference. Use the measuring tape to measure then note the distance of your controls on the handlebars, then use the level to measure then note the positions of your controls.
Next, you need to remove the grips, brakes, and shifters. If you have any other accessories on the handlebars, remove those too. It is helpful to let the brakes and shifters hang to each side of the bike for easier reinstallation later.
There are two types of stems you might be working with, one is a removal faceplate and the other is a compression slotted stem. Currently, the most popular stems are the ones with removable faceplates for which you will need to support the handlebar as you loosen the four bolts or the handlebar may fall.
Select the proper sized Hex/Allen Wrench and remove the four bolts. The handlebar can now be removed. If you were lucky enough to grab a newer, used mountain bike you might have snagged one with an electronic shifting system. If you did you now need to slide and remove the electronic shifting wire through and out of the handlebars.
There should be a single bolt holding the bar to the stem, using the proper Hex/Allen Wrench loosen the bolt. Next, you should slide the bar out. If you have an electronic shifting system this is when you need to put the wire through the new handlebar and then the stem.
Next you will want to wipe down the new handlebar and the stem and apply a very small amount of grease to the holes for the bolts on the faceplate, or if using the compression slotted stem apply the grease to the bolt holes and bolt threads.
For carbon bars get the assembly compound and apply a small amount where the bar and the stem meet, this is needed to create friction between the bar and stem without causing rotation and acts as a barrier between the stem and bar materials. Make sure that you spread the compound over the entire area that is covered by the stem.
Next, place the bar whether it is carbon or not into the stem. If you are using a removable faceplate be sure to follow the directions of the bolts. Some stems require that bolts be screwed in evenly prior to tightening down.
Other stems require either the top or bottom set of bolts to be screwed in completely prior to continuing on to the other side’s bolts. The stem should be labeled with exactly how to tighten the bolts. Using the compression slotted stem is slightly easier, you insert the bar the same way you removed the first one.
At this point, your handlebars should be moveable. Put your bike on the ground and stand over it as if you were going to ride it in order to center the handlebars and then set your desired amount of roll. Now take your torque wrench and tighten and torque the bolts on whichever stem you using.
If you have a removable faceplate stem you will need to do this is incrementally in an “X” pattern. If you have a compression slotted stem, tighten and torque the bolt. Your new bars are now installed, now you can reinstall the grips, brakes, shifters, and any other accessories.
In order to do this use your measurements that you took earlier on and then simple do the steps in reverse. If you can’t quite recall how something looked then use the picture that you took with your phone which is very handy for this step.
3. Brake Pads
If the used bike that you get has brakes, then most likely it is disc brakes. The two types of disc brakes available on MTBs are hydraulic and mechanical, both types move the caliper which causes the pads to press against the disc which in turn wears down the brake pad. So, just like a car’s brake pads, your brake pads on your mountain bike will need replacing too every once in a while.
So how do you know when your bike’s brake pads need replacing? One sure way to tell that they are past needing to be replaced is when you hear screeching like metal grinding on metal when you try to use the brakes. This could mean that your brake pad is completely worn down.
Generally, MTB brake pads should be at least 1mm thick, this is the width of three business cards stacked on top of each other. Another way to check if your brake pads need to be replaced is by looking at them, this is easy to do since they are usually visible from the underside.
If you are having trouble braking with minimal effort or it seems that braking is taking longer than usual, your brake pads could be contaminated. In the case of contaminated brake pads they need to be replaced and you should also try to find the reason for contamination.
Replacing the Brake Pads
If you do need to replace your brake pads, this is something that is easy to do. You will need a pair of needle nose pliers, a Hex/Allen Wrench set, and a flat head tool to be used to press in pistons. Just like in cars, MTB brake pads are semi-specific to the braking system.
This being said, there may be compatibility issues with rotor and pad material combinations, so watch for warnings and labels on packaging and parts. There are two main types of brake pads: resin brake pads which are sometimes called organic or sintered brake pads which are metallic.
Choosing the proper brake pad can be as easy as taking the bike or old brake pad to your local bike shop or as difficult as scrolling through a manufacturer’s website until you find a match. Once you have a brake pad, you can begin the brake pad installation.
As with any repair on your MTB, mount your bike in the repair stand first so that it stays put without moving around on you. There are several brake caliper designs, so what you have to do may vary slightly. Remember the order of your steps because you will do them in reverse in order to put the new brake pads on.
Your caliper may have a pin used to secure the pads in place, this is called a retaining pin. If you have this then you should start by removing the retaining pin either by using a Hex/Allen Wrench or needle nose pliers for a cotter pin or by removing the pin clip with your fingers. Once the pin is removed then you should be able to remove the old pads.
The pads are held against the pistons in several ways, usually with springs, magnets, or clips. If your caliper uses clips it might take a bit of elbow grease to wiggle them out, but whichever one it uses it should be fairly simple to get them out.
Next, you have to prep your calipers by retracting the pistons to make room for the padding on the new pads. This is where you take your flathead tool or maybe use a cone wrench since you don’t want to cause damage and then press the pistons back into the caliper. You will only do this with hydraulic brakes. For mechanical brakes, you will simply turn the pad adjusters in a counter-clockwise motion until they stop.
You are now ready to insert the brake pads just as easily as you removed them. Remember that if you are installing clipped pads you may need to wiggle them in a bit. As with any part, be sure to check the packaging for any instructions for prep and installation tips.
After the pads are installed then you can reinsert the retaining pin. Your brake pads will wiggle a little after installation and this is perfectly normal. If you have mechanical brakes you will need to align your calipers after the installation of new brake pads.
For hydraulic brakes you should pump the lever so that the pistons and pads move into working position and you can feel the pads come in contact with the rotor. Next, spin the wheel and look and listen for any rubbing. If there isn’t any rubbing then you are good to go, but if you hear or see rubbing at all then you will need to align your calipers.
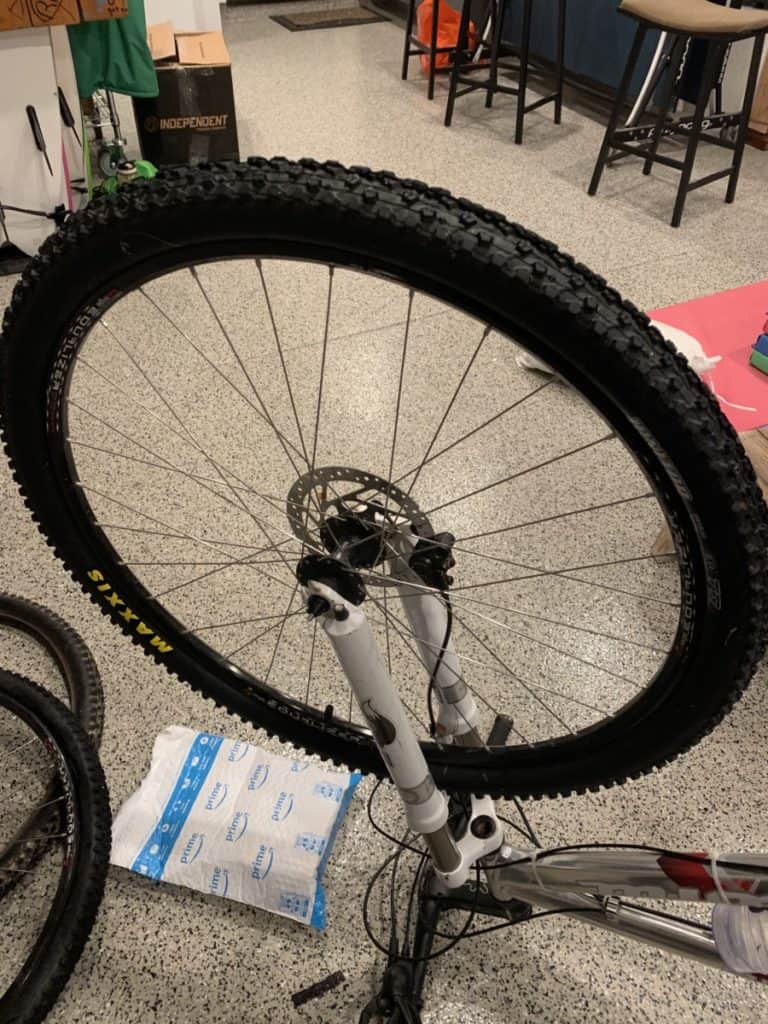
4. Tires
Just like with the brakes, the tires are an equally important part of the longevity of your used MTB and there are a few tricks and tips in determining whether or not you should replace them. The most important consideration is your safety.
If the tires are very noticeably worn down and you can see threads coming through, then it is definitely time to change the tires. Again, you should ask yourself – or better yet the previous owner – how hard this MTB was ridden, how frequently, how hard you intend on riding it, how frequently, in what weather conditions, and if there will be a lot of muddy downhill terrain.
Consider your answers and measure these against the warning signs for tire replacement. Constant flats are a good indication that your MTB tire needs replacing, you should also be looking for bubbles or deformities in the tire. If you see worn-down tread or flat spots down the center of the tire, replace the tire.
Look for cuts or holes on the knobs in the tread, cracks in the rubber on the sidewalls too. If your tires are equipped with wear indicators such as different colored rubber, dimples or grooves that appear or disappear when replacement is needed, then you should replace your tires when indicated.
Changing Your MTB Tire
Once you have decided to change your tire or tires, the actual process is pretty simple. You can do it with or without tire levers but you will need to have an air pump. With your bike secured on the repair stand, remove the wheel of the tire you are replacing.
This process is for a tube and tire replacement first, and for this you have to let the air out of the tire before you can do anything else. Next, you’ll need to loosen the bead of the tire from the rim. Using your thumb, push the bead inwards away from the rim while rotating the wheel so that one side of the wheel has been pushed into the middle of the rim.
Now, remove the tire by pulling up and back so the tire goes up and over the rim. Do this until the tire comes off but be careful not to pinch the tube. If you cannot get the tire off you can use tire levers, but again be careful not to pinch the tube.
Place the tire lever under the bead, do not do this near the valve, then attach it to the spoke. Place another tire lever in the same way about 5 inches from the first one, with the tire levers in place pull the tire up and back until it comes off. Now that you have one side of the tire off, you can pull out the tube. After the tube is removed pull the tire up and back again until the wheel and tire separate.
Get the new tire and make sure that the disc brake is on the left-hand side for proper rotation. Sit the wheel inside the tire and slowly work the bead into the rim on one side of the wheel. Next, replace the tube by filling it with a small amount of air so it is easier to handle. Line up the valve with the valve hole and place the tube in the rim.
Using your thumbs, work the bead back into place being mindful not to pinch the tube. Doublecheck that the tube isn’t sticking out of the rim and that the bead is completely inside the rim. If this is done correctly inflate the tire and reattach the wheel to your bike.
5. Grips
One thing you may have overlooked when buying your used mountain bike was the grips. The more you ride, the quicker that these will wear out. One way to tell if you need to replace your grips is if they feel sticky or tacky. Another key indicator that you might want to consider is if the knurling or design on the grips has worn down. If you decide to replace your grips, there are two types to consider lock-on grips, which lock on with a bolt, or the slip-on/push on grips, which simply push on.
Replacing Grips
After you’ve selected your preferred grip, you will need a flathead screwdriver, a Hex/Allen Wrench set, and a self-evaporating solvent like disc brake cleaner. Before you remove the grips, remove the bar end plugs if needed. To remove the slip-on grips you’ll need to use a Hex/Allen Wrench and separate the grip from the handlebar and then while it is lifted spray some of the solvent under the grip.
This will help you work the grip and move it around so that it loosens from the handlebar so you can take it off. Repeat these steps on the other grip. To remove the lock-on grip, find the correct size Hex/Allen Wrench and loosen the bolts until the grip can be removed.
Now, if using slip-on grips, spray solvent on bars and inside grip then slide it on. If using lock-on grips, attach then tighten bolts. Don’t forget to replace your bar end plugs.