I have an Altima so the scariest part of purchasing a bike was, “after I buy the bike in the store how am I going to get it back home?” And I know now mountain bikes can just as easily be purchased online so then the question becomes “do I have to ride the bike to the mountains?” and can a mountain bike really fit in a car? Because face it, if I can put my bike in my car, I can literally ride anywhere.
Cars are not designed to transport mountain bikes. That being said there are options for transporting your mountain bike in or on your car depending on the bike and the car. If you have a car with a fold down seat and a bike with a removable front tire you are good to go. If neither of these options are available, you can still transport your bike with your car.
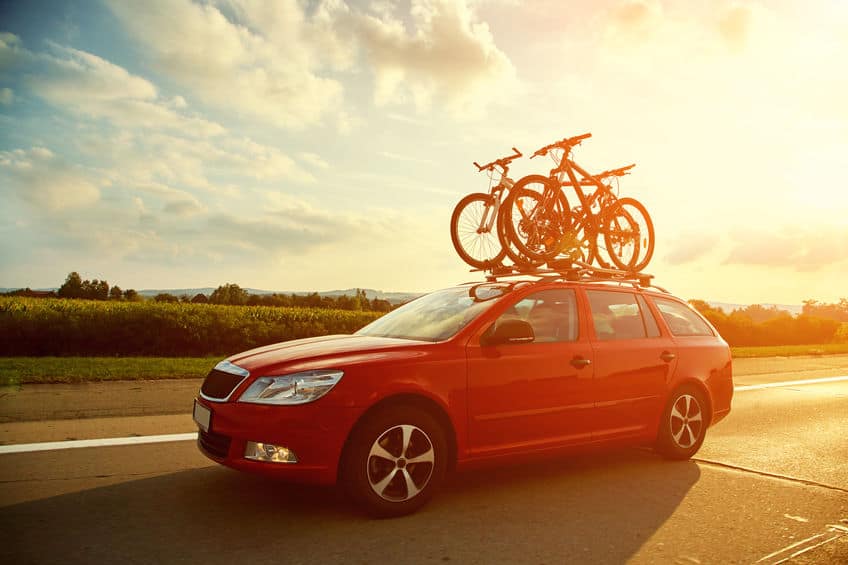
Utilizing a bike rack to carry your mountain bike may make you look all professional, but it also allows everyone else to see your gem of a bike. Which is cool, unless they have less than honorable thoughts. And then there are the stories that you have heard of people forgetting that their bikes are perched on their hoods, mishaps with tunnels, and garages are not so far-fetched. And what about assembling the rack on your trunk or hood without doing bodily injury to either yourself or the car?
And if you are still not dissuaded and are steadfast on a bike rack, we will get to that, but for those who want to fit the bike in the car, it can be done. Safely, and hopefully without doing any major damage to the inside of your car, or more importantly the mountain bike itself.
So to avoid you having to go through trial and error and damaging your car or your bike, we will examine several different ideas of how to transport your mountain bike to your favorite biking destination.
The first process is brought to us by Top Gear.
Top Gear’s Step by Step Process For Transporting Your Bike in Your Car
- Wet wipes are your friend. Make sure your bike is reasonably clean before you stick it in there.
- Remove the front wheel and store it in the trunk. Apparently slamming the trunk hinges on the wheel is a thing…don’t make it your thing.
- Put the chain on the small ring.
- Gently place the bike on the floor, non-driverside facing the seat. Position the left pedal at 12’o clock to stabilize the bike on the backseat. Place a clean piece of cloth under the pedal to avoid staining the seat.
- Place another piece of cloth under the fork dropouts. This prevents the forks from puncturing the seat.
- Size matters. This process works for most small to medium sized mountain bikes. Fatties and plus sizes are not going to fit. They will require an external rack.
Speaking of size, what if you are environmentally friendly and have a smaller car? Don’t let the people at Top Gear discourage you. According to mountainbikeheart.com even small can transport a mountain bike. Yes you can transport your mountain bike in a small car according to mountainbikeheart.com.
Mountain Bike Heart’s step by step process for transporting your bike in your small car
Step 1
First step is to remove your front wheel. Most mountain bikes have a quick release (spoiler alert when buying a mountain bike look for one with a quick release front wheel) front wheel.
If you happen to have a mountain bike without a quick release front wheel, no problem.
Grab a couple of adjustable wrenches.
Notice the nut on each side of the center wheel.
Hold one of the wheel nuts with your wrench.
Use the second wrench to unwind the opposing wheel nut.
Loosen the wheel nuts on both sides
Check that the wheel nuts and all washer rings are free of the forks.
Wheel is released
Step 2
Brake time! Now is time to get the wheel free of the brakes
If you have mountain bike disk brakes, it’s a non-issue and you just carefully slide the wheel off
If you have rim brakes ugh! But there are two ways to deal with it
Loosen the brake cable: with pliers grab and hold the excess cable about an inch downline past the cable clamp. Once you have a grip on the cable, unscrew the brake cable clamp nut, which will release the cable to the point of the cable that you are holding it with the pliers. (Still with me?) Then screw the cable clamp nut up firm, to hold that position. Check to see if the wheel will now fit past the brake pads. If it doesn’t don’t fret. Repeat the process until the brake pads have been opened up enough to get the wheel off.
Or if you want an easier option release the tire pressure. I know. But make sure that you have a pump to reinflate the tire once you get to where you are going.
To release the tire pressure, find the air valve located on the inside of the rim and unscrew the valve cap. You should now see the valve and in the center is the valve pin. To release tire pressure you need to hold the valve pin down. Use what’s handy. Anything that can fit in there.
Release the air enough that you can grab the tire with your hand and easily compress the tire with one hand. Now you should be able to squeeze the tire between the brake pads and get the wheel off.
Step 3
Loading the bike
First protect the car, have a blanket or seat protector over the back seat.
Pick up the mountain bike and hold it with the rear wheel pointing into the open car door.
Guide the rear of the bike between the front seats and the back seat.
Careful! Watch out for the pedals and front sprockets so they don’t catch on anything.
Gently slide the bike in adjusting the pedal position to best suit the resting position of the bike.
Adjust the handlebars you can usually turn them around easily enough.
Remember the front wheel and put it in the trunk or carefully place it in with the bike in the rear seat
Now you are ready to head to your favorite riding destination. Remember to have a sheet or some sort of protection for your back seat. It might not seem important on your way there, but a muddy mountain bike on the return trip home can cause some major damage to your car.
And not to be left out Red Bull has a guide to help you if you happen to be driving around in a hatchback.
Red Bull Ace the Space guide to packing your bike in a compact hatchback
- Fold down the rear seats: Make sure to line the boot and back of the seats with a mat or newspapers or anything that will keep the mud and grime of the seats on your return
- Remove the wheels. Remember to shift down to the lowest possible gear so that your chain has the least tension. It will make removing the rear wheel a lot easier.
- Mind the brakes, for bikes with disc brakes, remember to stick on some disc brake plugs.
- ‘Dry’ side up means when packing your frame in the car, place the side of the bike where the brakes, derailleurs and chain are located. This prevents unnecessary pressure on those parts of the bike.
- Wheels as cushions is the easy part. Once the frame is packed in, place your wheels where convenient. Use the wheels to cushion portions of the frame that are likely to rock. Keep everything snug.
Yes, there are other options to fitting your bike in your car. Including YouTube videos that can be found here or here if you are a visual learner.
Have you noticed that every way begins with releasing the front tire? Keep this in mind when purchasing a bike, a bike that has quick release tires can make your life easier.
If you happen to be one of those person’s who has the mountain bike and is in the market for a new or used car, carbuyer.com has listed the best cars for cyclists and bikes. Although most of the cars they feature can be fitted with third-party bike racks, this list concentrates on official manufacturer rails and racks.
Carbuyer’s best cars for cyclists and bikes
- Land Rover Discovery: Fold down all the rear seats and you’ll fit one or two in the back with their front wheels removed. But there is also the dedicated official Land Rover accessories. There are the tow-bar mounted carries available that can carry two or three bikes. Or you choose the roof mounted fork or wheel-mounted carriers. Capacity of two bikes on the roof, three on the tailgate and about two in the boot.
- Mercedes E-Class Estate: Yeah if you have the money why not? The E-Class Estate has a vast boot that will accommodate a couple of bikes with their front wheels removed and the rear seats folded.
- Honda Jazz Hatchback: If you want to transport your bike inside the Jazz, it has a rear seat that flip up against the seatbacks to reveal a flat, wide and open rear storage area that’s easy to load a bike with its front wheel removed.
- Nissan X-Trail SUV: This car is huge inside. The X-Trail offers the option of seven seats. Which means plenty of room for bikes especially since all the seats fold almost completely flat.
While I realize that most of these are high end cars, it is worth a mention. There are some cars that are more adaptable to transporting your mountain bike. You don’t necessarily have to go all Land Rover, but it doesn’t hurt to find similar features in a less expensive car.
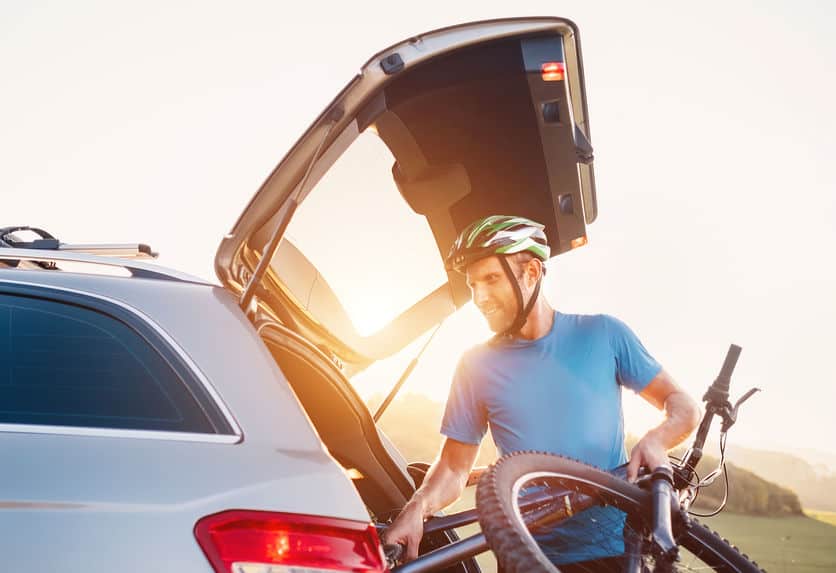
But you say, you already have a car and while you can fit one bike in your car what will you do with your friends’ bike who is riding with you? Or maybe you just don’t want to take your bike apart and put it back together again each time you go for a ride. While this is about fitting your bike in a car, I would be remiss if I didn’t mention ways to fit your bike on a car also.
So yes, a mountain bike can fit in a car, but it can also be transported by a trunk mount, hitch mount or a roof mount, all securely attached to your car.
Trunk mount
These are the least expensive and can be easily removed from the car when you are finished transporting your bike. Truck mounts use only straps and buckles, so yes, they are not the most secure. So while you are only paying $50 to $250, you might lose in other ways. They do little to prevent theft and damage to either car or bike is a possibility. Needless to say a trunk mount is a quick fix and should only be used as a temporary option.
Hitch Mount
Does your car have a hitch mount, then you are one step ahead? If not, you have to include the cost of a hitch as well as the rack. There are two versions: ones that hold the bikes by the frame, or ones where the wheels sit in a tray.
The tray mount type can hold any bike and tend to be more stable and secure. Expect to pay between $200 and $500 for a hitch rack.
Roof Mount
Roof racks tend to be the most stable and secure. The two major rack vendors are Thule and Yakima, and both make systems for a wide variety of car models. The cost of roof racks depends on your car and which model you choose.
But back to the main question. Mountain bikes can be securely transported inside your car by making just a few adjustments. Remember to have a cloth, mat or newspapers to cover the area you are going to transport the bike. It doesn’t seem important on the way there, it will be important on the way back.
The wheels are going to be removed, in some cases just the front wheels in other both wheels. Most mountain bikes come equipped with quick release wheels so that makes it easy. The weight of the bike though rarely mentioned is a factor. Fortunately, you are not required to lift it too high, when putting into your car, but it might be slightly awkward. Be careful not to hook the handlebars or pedals onto the seat or door handle.
It isn’t rocket science getting your mountain bike in your car. With a little patience and a lot of persistence it can be done. Then you and your bike are off to explore more trails.