One of the nightmares mountain bikers experience regularly is the pinch flat problem. Also referred to as snake bite or pinch cut at times, the pinch flat can be so annoying because it mostly happens at the least expected time. For the benefits of those who are new to mountain biking, I would love to explain some biking terminologies so you can clearly understand.
What is a pinch flat?
A pinch flat is when you hit the tire of your bike hard enough against a sharp edge to the extent that it presses your inner tube against your rim so that it pierces the tube and causes a deflated tire. You need to note that a pinch flat is different from a puncture as a result of running over a sharp object like a nail or glass or wire.
A pinch flat is usually characterized by two smallish holes of about ½ inch apart from each other. Hence the origin of the name snakebite, because that is what it looks like. The “bites” comes from the two parts of the rim where the tube was pressed against.
The major cause of pinch tires is the under-inflation of a tire. Because the air pressure is not sufficient to prevent the tire from collapsing to the point where the tube can be pinched by the rim. However, there are also some other known possible causes of a pinch flat, they include: hitting your tire against a sharp edge, rock, or other object or using a thinner or a smaller tire.
Unfortunately pinch flats are unavoidable, and then you have to fix your tire, but the good news is that there are steps to help reduce its occurrence rate to the barest level and, if possible, nearly eliminate it. Here are 7 tips on how to avoid pinch flats on a mountain bike.
1. Choose the Right Bike
As simple as this might seem yet a lot of people make grave mistakes when choosing the right bike for themselves. When choosing a bike, you should consider some factors, most importantly you should not be trying to ride a road bike on the mountain bike trails.
This is because road bikes are not made for the rough surfaces, rocks, roots, etc. that comes with the trail. Instead these bikes, and the tires that come with them, are made for riding on smooth cement roads. As a result tires that are made for road bikes can even get a pinch flat when they hit a pothole too hard.
Ordinarily, for a novice, you might ignore the importance of the tires of the bike you plan on buying. The point here is that for tires the wider the tire is the more cushioning effect it will provide when there is an impact. And in most cases, wider tires avail you the opportunity to ride them on low pressure without risking a pinch flat.
If you are someone who weighs a bit more, then you might want to invest in bigger tires to help carry your weight comfortably without putting much pressure on the tube through the rims. Remember that a pinch flat is caused not just when you tube folds, but when it folds and there is enough weight on it to really pinch down on the tire, then is when you get a pinch flat.
2. Check Your Tire Pressure Regularly
If you want to avoid pinch flats or punctures on your mountain bike, then you must start checking the pressure of your bike tires regularly. As you already know, a pinch flat can only occur when the inner tube is pressed hard against the rim due to a sudden impact.
To reduce the chances of this occurring, always make sure that you carry out a routine check of your tires before each ride and give them a good squeeze or two to make sure that they feel like they are the right pressure.
A routine check before every ride is necessary simply because the tire pressure drops during a ride or when the bike is at rest due to some factors. These factors range from weather, road condition, and even the weight of the rider.
Even though you might not be familiar with how a tire is supposed to feel when you squeeze it, this is still something good for you to do in addition to actually measuring the pressure at first until you learn how to tell if the psi is good just by squeezing it.
One thing to keep in mind is that it is in a way a balancing when it comes to tire pressure. Virtually all mountain bikers have their preference when it has to do tire pressure. While for some riders a lower pressure can lead to an improvement in terms of grip and comfort, for others it might translate to a lower bike speed when in motion.
However, you should also bear in mind that tire pressure requirement depends on some factors such as the tire width. The wider the width of the tire, then the less pressure that you will need to cushion the effect or force of an impact.
A properly inflated tire help to avoid flats in general. Under-inflated tires are prone to flats. Also, there is more tire surface on the road to pick up sharp objects such as wires, nails, and glass. When a tire is inflated correctly, it rolls better, faster, and help it to last longer as designed.
To properly increase the tire to its right pressure, carefully check the labels on the tire to find the correct rating by the manufacturer. Generally, it will be indicated as psi, which stands for “pounds per square inch” or shown in kPa, which is the metric unit for measuring pressure.
Furthermore, you can determine the pressure level of the air in the tires by using a bike tire gauge. This measuring instrument can help you decide whether to add or reduce the air pressure level of the tire before embarking on your ride. Also, you will need a portable hand pump to inflate the tire in a situation where there is a need for you to add more pressure, such as if you need to make some tire repairs while you are out on the trail.
So if you already have your bike or planning to get one, I would recommend that you get yourself a bike tire gauge and a portable bike tire pump so you can easily follow the process yourself. You can as well search and buy any of these tools from online stores such as eBay, Amazon, or any other online store of your choice.
Just keep in mind that you want both of these to be easy to carry with you to the trails so that you can have them when and if you have tire trouble out in the middle of nowhere.
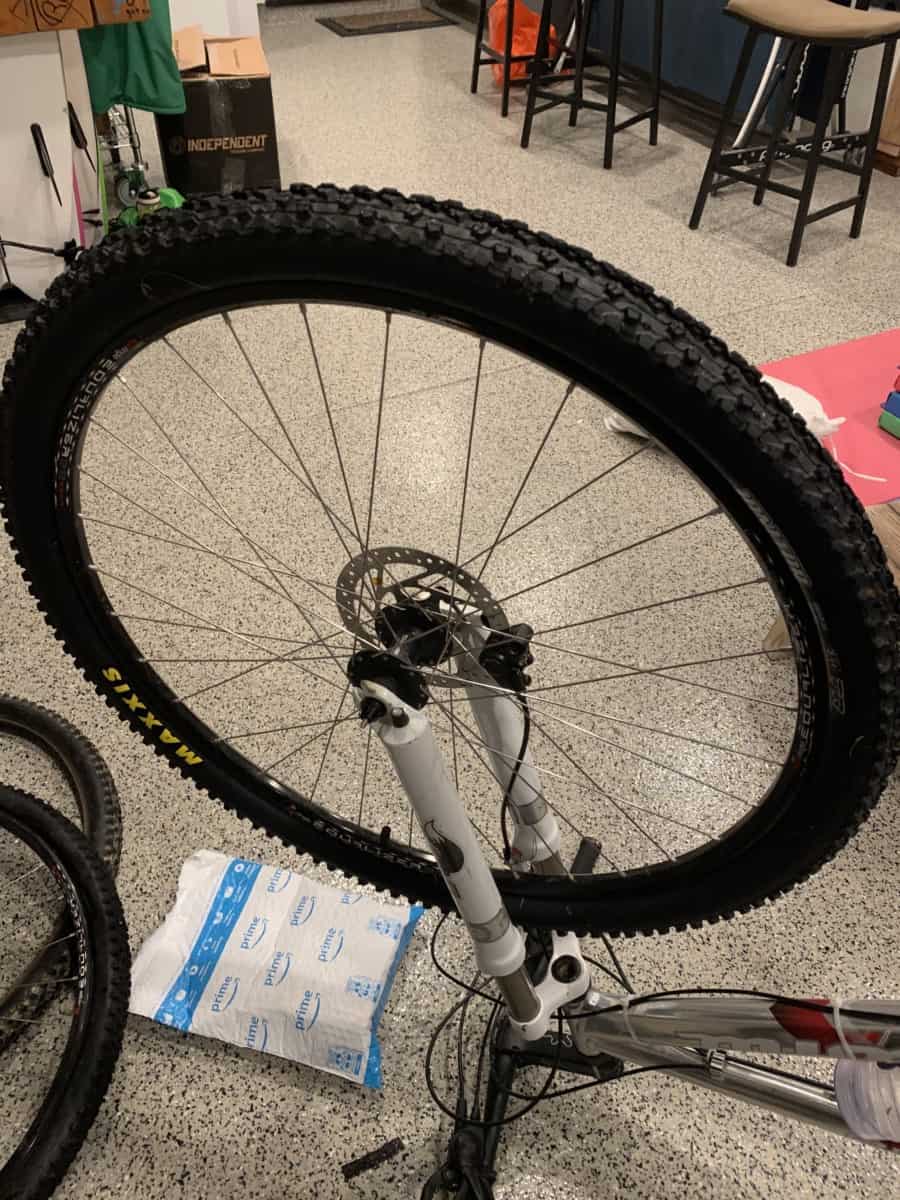
3. Choose The Right Set Of Tires And Tubes
Ordinarily, as humans, we all want the best kinds of tires when the need for a change arises. But, most times, our criteria for what we call the best might be based on the wrong parameters. Naturally, we might be tempted to say the best tire is the lightest, the fastest, and the one with the best grip in the world.
Contrarily, a tire with such characteristics might not necessarily fall within the category of the best kind of tires for your mountain bike because such tires are prone to pinch flats and other forms of punctures. Generally, lightweight tires are more malleable than the thicker ones.
It also means that it is easier for such tires to pick up flints, debris, and other sharp objects, thereby risking the chance for a puncture. Durable and high-quality bike tires are known to have a dense layer that is reinforced to make it puncture-resistant. This design helps to stop sharp objects from penetrating the tires through to the tube.
Unfortunately, this design comes with its own cost. It makes the tires to have extra weights and to lack the ultimate grip making it difficult for use in racing bikes. But if your top priority is durability and to avoid getting pinch flats, then you should consider going for it.
When choosing the right tire for your mountain bike, your choices should be influenced based on what you are using the bike to do. Keep in mind here all of the rough wear that you are putting a tire though on the rough trails that you ride on.
You can choose from the verities of quality brands out there, such as the Kelvar brand, which is designed with a durable belt of aramid fibers to help resist punctures. Also, there is a brand marketed by the Serfas Flat Protection System, the Michelin ProTek reinforcement system, and so on.
These brands are designed to have thick treads, thereby giving it a puncture resistance. Alternately, you should consider using thorn-resistant tubes. These tubes are designed to be thick and heavier than the usual conventional tubes and therefore are slightly less prone to pinch flats.
4. Avoid Rough Spots As Much As Possible
Riding a bike also requires that you choose the roads or paths you ride on. Sometimes out of the trail there can be a lot of sharp objects like glass, thorns, rocks, and even cactus. These sharp objects might be lurking at the edges of the trail or even in the center of a singletrack.
Common sense, therefore, demands that you avoid such things if possible if you know that you can avoid them and that they will be bad for your tires if you don’t.
When the trail is really rocky you should try as much as possible to prevent an impact as that can pose a considerable risk of a pinch flats to a mountain bike. Rather than focusing on just the trail in front of you, keeping your eyes ahead can help a great deal by giving you ample time to spot and prepare for things that might impact your tire.
When riding in a group, you should consider calling out to teammates whenever you spot a hazard as they approach. By so doing, not only will it keep the group safer, it will help avoid time-wasting if one of you should suffer a pinch flat.
On the other hand, if, for any reason, you can’t avoid coming in contact with a hazard, which will likely cause a puncture or a pinch flat, quickly loosen your grip on the bars and lean back as much as you can and try to glide over the obstacle. Leaning on the bars in such a situation tends to force the weight of your body to add more pressure on the front tire upon impact, thereby increasing the chances of a puncture.
If you are confident of your biking skills, you can maneuver yourself out of a hole. Try hopping over the hole to reduce impact. But this is only advisable when you are not riding in a group as there can be a risk of collision when you are in a group.
For night rides, you should have a bright white headlamp or a torchlight attached to your bike. The reason is that at night visibility an essential part of seeing things that might cause pinch flats in enough time for you to get ready for them.
5. Carefully Refit Tubes And Tires
One of the worst-case scenarios is for you to have to either replace your tube, your tire, or both of them while you are out on the trail, especially if you forgot to bring your tools with you. Great care must be taken when fitting a new tube and placing the tire back on. If care is not taken, you might end up pinching the tube with your work tools during as you are trying to put it on and inflate it.
When changing only the tube, with your middle and index finger placed side by side, carefully run them around the two inner sides of the tire. For a better result, you should repeat it for the second time on both sides to get rid of any foreign object. By so doing, the chances of leaving any debris behind will be minimized.
It is easy to assume that because you have changed the tube, then you have taken care of the flat or puncture. But there might just be a bit of a tiny nail or sharp object stuck in the tire waiting to give you another puncture as soon as you inflate the tire.
When placing the tube, you should consider applying some powder to it. This might sound strange to you, but trust me, it works magic. Using powder when installing the tube will help give you an easy installation of the tube. This is because applying powder has a way of reducing friction between the tire and tube.
Secondly, you should try this because of the powder between the tire and the tube it will allow the tire and the tube to work independently of one another, which is the way they were supposed to do in the first place. Finally, the powder creates an effect that will allow the tube to correctly align in the tire upon inflation without dragging the rim tape out of alignment.
After you must have fitted the tube in the tire, add a little air. You should do this now because you don’t want the tube to be caught in between the rim and edge of the tire as you inflate it. Now, as you fit the tire, make sure to keep checking. You should try as much as possible to avoid the use of tire levers during this process.
When you are sure that the tube is fitted correctly in the rim bed, use your hand pump to inflate your tire the rest of the way, making sure that you pressurize the tube according to its specification. Finally, please check for air leakages from the valve by pouring some water on it. If you notice any sign of a bubble, then it means that there is air leakage. Also, check for bulges and lumps by doing a quick spinning of the wheel before setting off.
6. Switch To Tubeless Tires
The tubeless tires technology has been around for years. It has gained and has continued to gain widespread acceptance by bikers of all branches, especially on the mountain bike scene where pinch flats tend to happen the most often. This is not unconnected to the fact that tubeless tires are designed to have a greater resistance to punctures.
In addition, one of the most significant benefits for mountain bikes is that there are zero risks of pinch flats because, in the first place, it doesn’t use a tube that could even get a pinch flat. Secondly, tubeless tires are used together with a sealant inside, which, in the event of a small cut in the tire, will work to block the hole before significant air is lost.
However, before you consider making the switch to a tubeless tire, you should take a look at some of the pros and cons of the technology. The first advantage that I will mention is that it cuts back on the number of flats that you will end up getting.
Part of this is, as mentioned, the fact that the lack of a tube means that you can’t get a pinch flat, but it is also the fact that the sealant inside these tires does a great job of stopping up any small holes that you might get from going over thorns and things.
The next advantage is a smoother ride and many mountain bikers even argue that tubeless tires make you faster. In the traditional tire and tube, the tire and tube are in close proximity, which creates some level of friction while riding. This adds to the biker’s work rate when pedaling, making it slightly harder.
Again, because of the absence of tubes, the tire can be inflated with a lower psi compared to the traditional clincher tire. This allows a larger part of the tire to flatten and come in contact with the trail, thereby giving the mountain biker a better grip and control and even a smoother ride. This limited level of psi helps to absorb little bumps and impacts.
Finally, when it comes to advantages a tubeless tire is also lighter weight. With the absence of a tube, your mountain bike can shed as much as 200 grams in weight. This will translate to a more comfortable and lighter ride for you as you pedal.
Now for some of the disadvantages, the first of which is the cost. While this might not always apply in all situations, it is generally more expensive to switch to tubeless tires. Switching will require some components that you don’t have already. Apart from getting the tubeless tires, you might need to change your rims to support and work with the tubeless tires.
The second disadvantage is that mounting your tire is more complicated. A tubeless tire can require a little more skill, time, and maintenance than the usual clincher. When mounting a tubeless system, it is crucial to ensure that the bead is correctly placed to seat and align on the rim to create an airtight seal.
You must also ensure that the valve stems are airtight and even the use of rim tape as well as a generous amount tire sealant inside. This tire sealant is also something that can be quite a bit messy when you need to change the tire for any reason.
Finally, although tubeless tires are resistant to pinch flats the major drawback is that the repairs are mostly not easy to carry out. Repairs can become impossible, especially when there is a large tear on the side that is beyond repair.
So, at this stage, you might need to carry an spare tube and a tubeless repair kit as you ride. To avoid being stuck in the middle of nowhere, you can quickly fit in your tube, inflate it and move on. So, before you take that decision to switch, you might want to give these pros and cons a quick thought.
7. Get Yourself A Portable Tool Kit
In as much as we want to be diligent and faithful enough with the tips to avoid pinch flats, the truth remains that pinch flats remain an inevitability when you are riding your mountain bike in all sorts of terrain and often in all weathers as well.
So, part of your plan should be to have a tool kit, a portable one that you can carry along as you ride in case of an unscheduled stop. Most importantly, you should try as much as possible to ensure that your tools are not just serviceable and reliable but are also a good fit for your bike. That way, you can avoid carrying along with you, tools that will become useless to you when the need for them arises.
To make things easier and to help you make the right choices when picking your tools, I have provided a list of the essential yet necessary tools that you must carry along in your tool bag, especially when going for a long biking adventure. These are:
A set of Allen Keys – also known as hex wrenches. This is a very important tool. All you need is a set that fits your bike, and you are good to go. Allen keys are also affordable and available in hardware stores.
Torx keys – it’s a common tool that is fast taking the place of Allen keys. Try and find out if you will need this in conjunction with the Allen keys.
Pressure gauge – a digital and portable pressure gauge will allow you to take an accurate reading of your tire pressure
Two sets of new tubes – having an extra tube might be your saving grace when you are stuck far away from home especially if you are using the tubeless tires.
Quick patch kits – having a quick patch kit with you is never a bad idea. You might need to quickly fix that pinch flats. There are two main types of pinch flats that you can get easily. A plug kit plugs up the hole on the outside of the tube by pushing a rubbery thing in the hole to literally plug it up. A patch kit, on the other hand is something that covers around the edges of a whole like a patch.
Portable air pump – these days, you can easily carry along a portable hand pump to quickly top-up your air or inflate your tires after a quick fix.
Finally another important thing that I will mention in closing is that it is very important that you learn how to do things like changing your tire and patching holes before you hit the trails, that way will at least have a basic idea what to do about them.